Official website links end with .gov.sg
 Signify
Admin Tutorial (Video)
Admin refers to the officer who signs in to signify.gov.sg and creates the workflow.
The video below is currently outdated as there are now two modes (email and link) and also fixed signing location feature. While the interface in the video will look slightly different, it is still relevant.
Admin Tutorial (Text)
Admin refers to the officer who signs in to signify.gov.sg and creates the workflow.
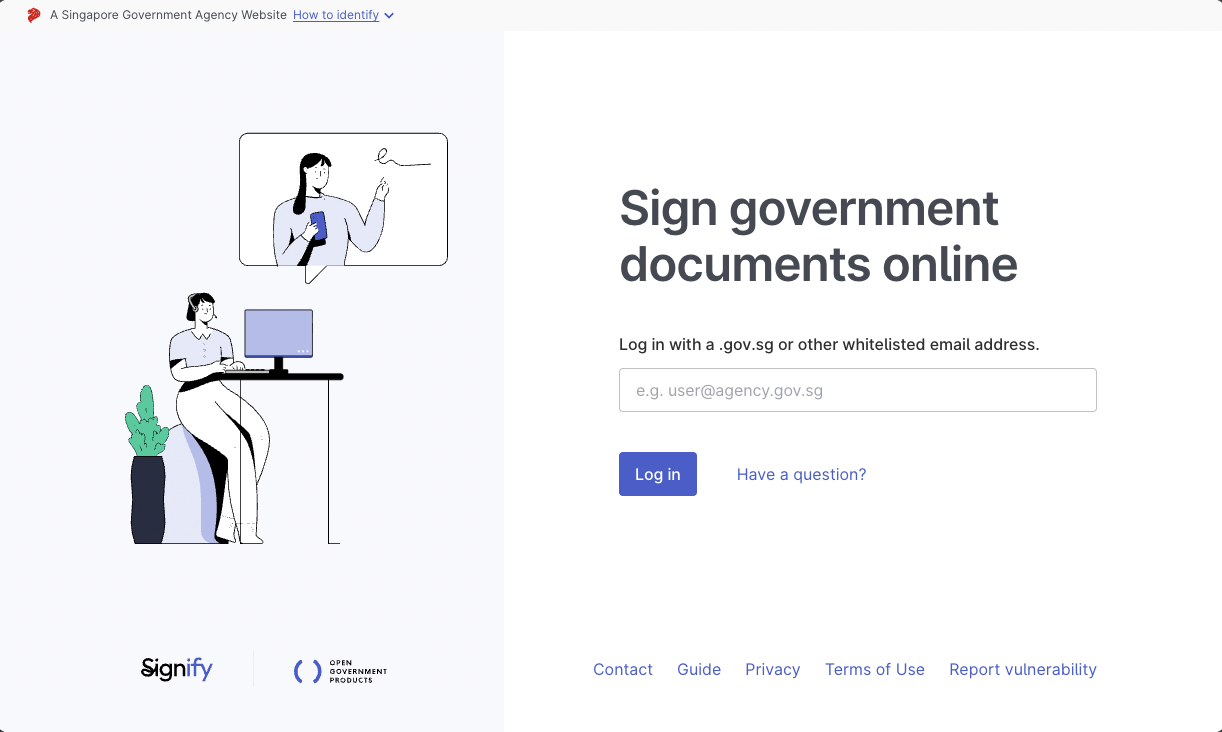
Step 1: Login to signify.gov.sg
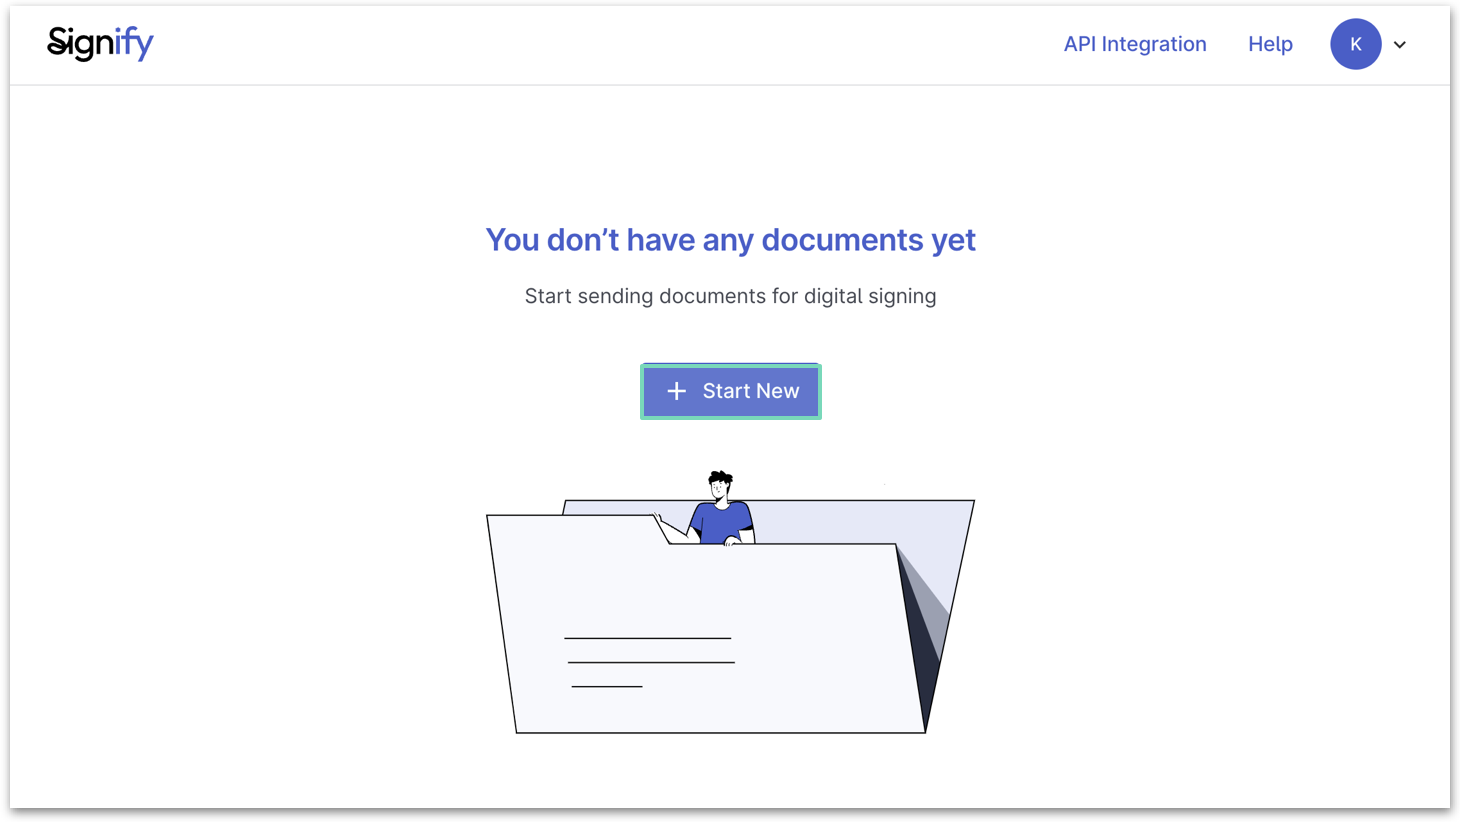
Step 2: Click on "+ Start New"
This will create a new signing workflow.
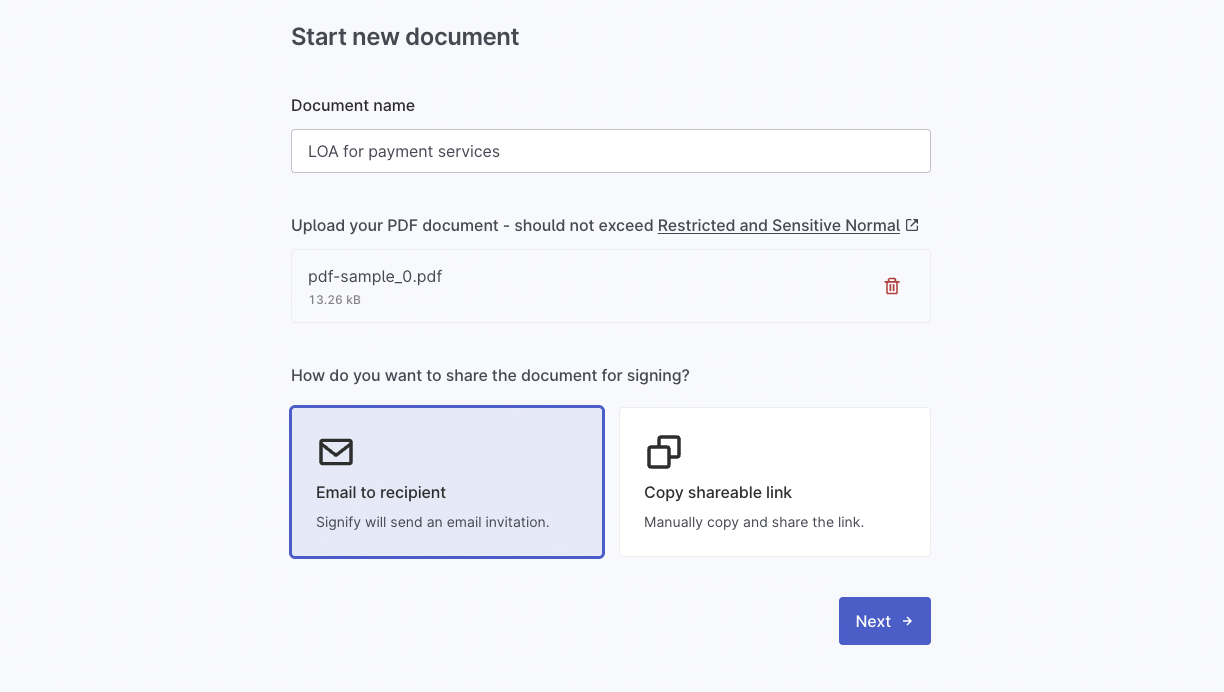
Step 3: Enter document name and upload PDF document
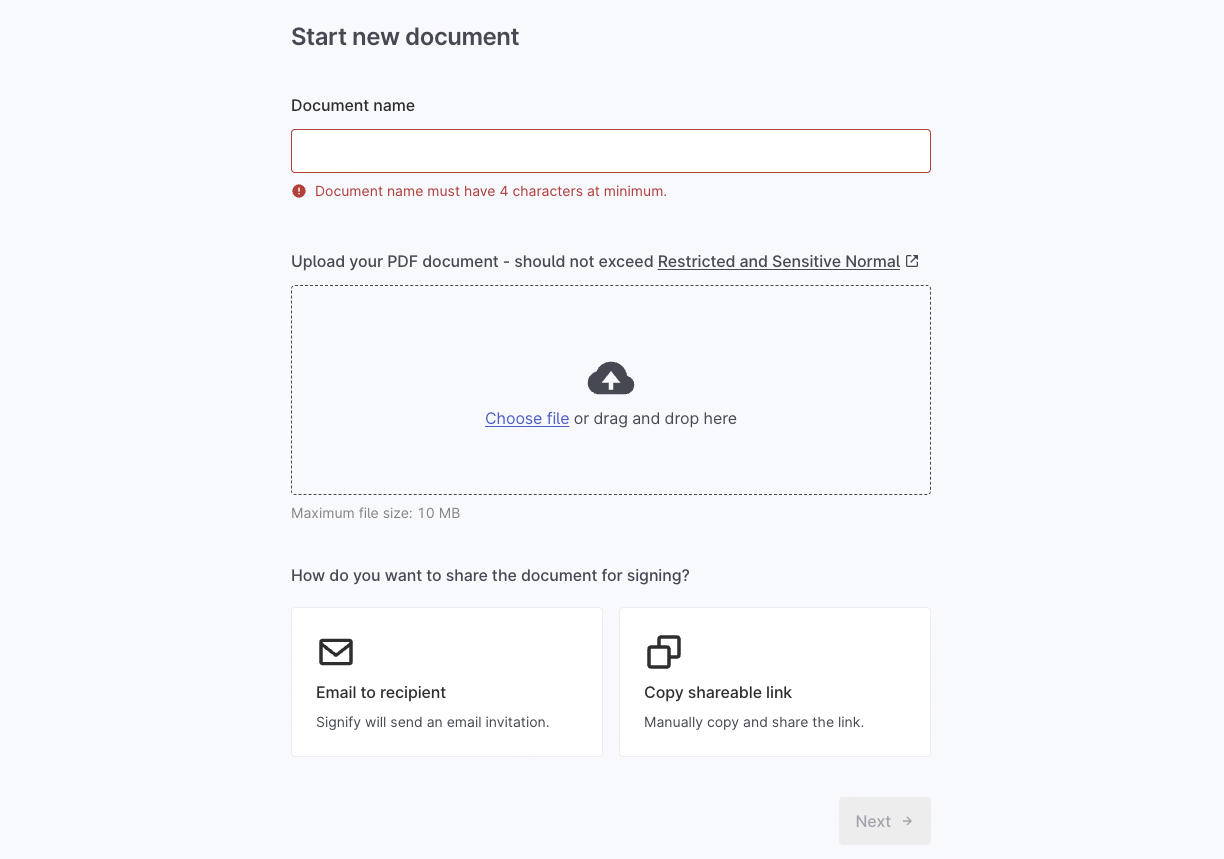
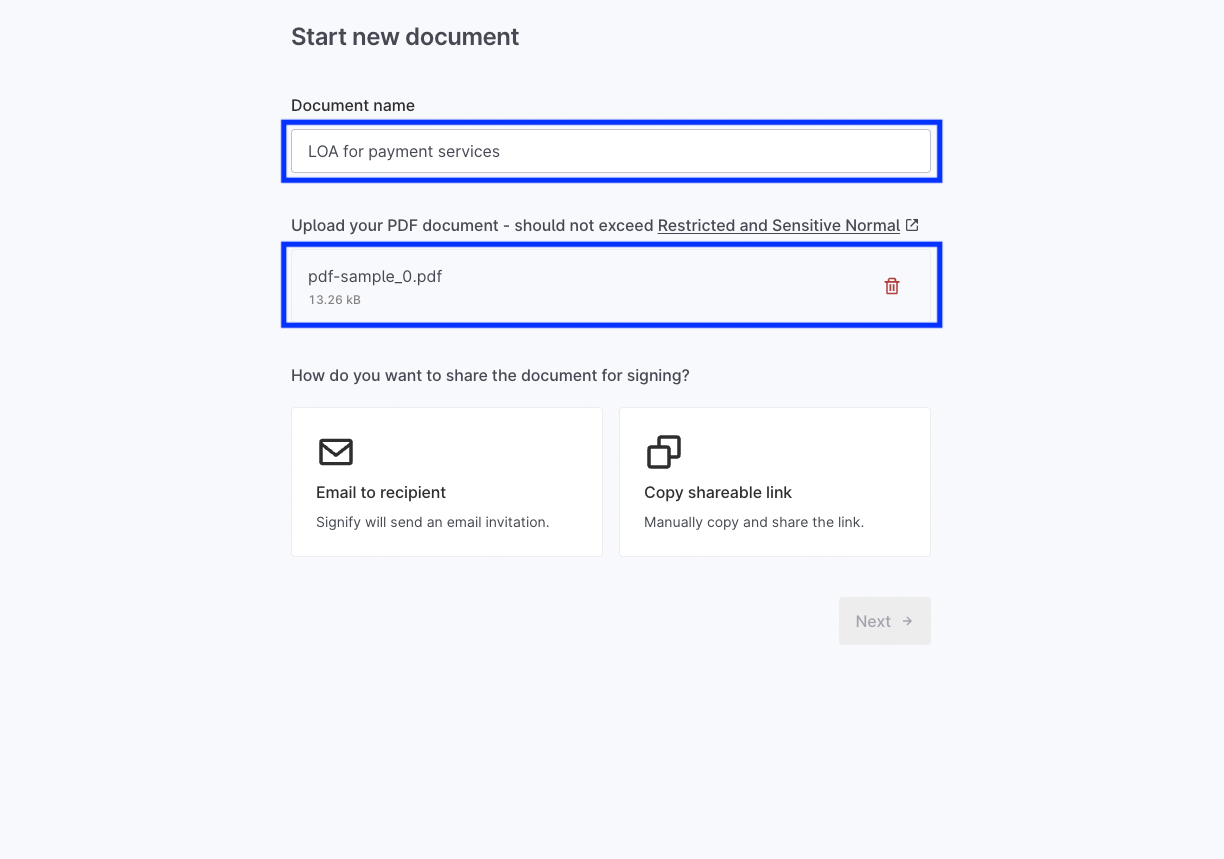
The document name is important for you to identify which workflow you are referring to. Upload only PDF documents. If you have other file types like word and excel, please convert them to PDF before uploading.
You will also be given a choice between sending to emails to recipients inputted by yourself or to share later via a link.
IMPORTANT! If you experience errors uploading the PDF, the PDF might have been generated using an older version. To fix this, regenerate this PDF file and try again e.g. using a newer version of Microsoft Word or open it in a web browser like Edge/Chrome.
Step 4: Add recipients
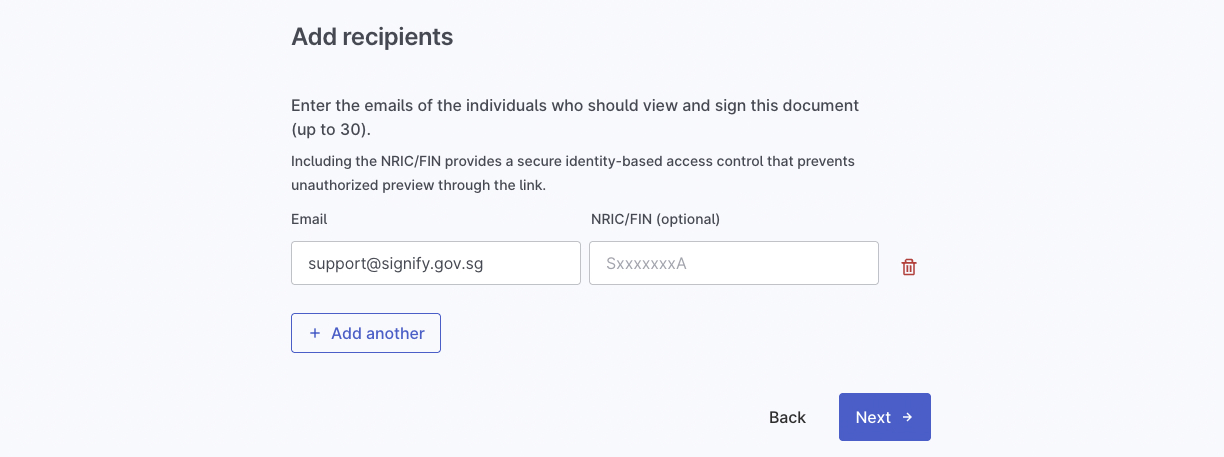
Step 4a "Email to recipient" mode: You will be asked to specify which recipients to send to. All the recipients have to digitally sign the document in order for the workflow to be completed. Signify also ensures that only one person can sign at a time.
Next, you will be asked to indicate where recipients should be signing on your document.
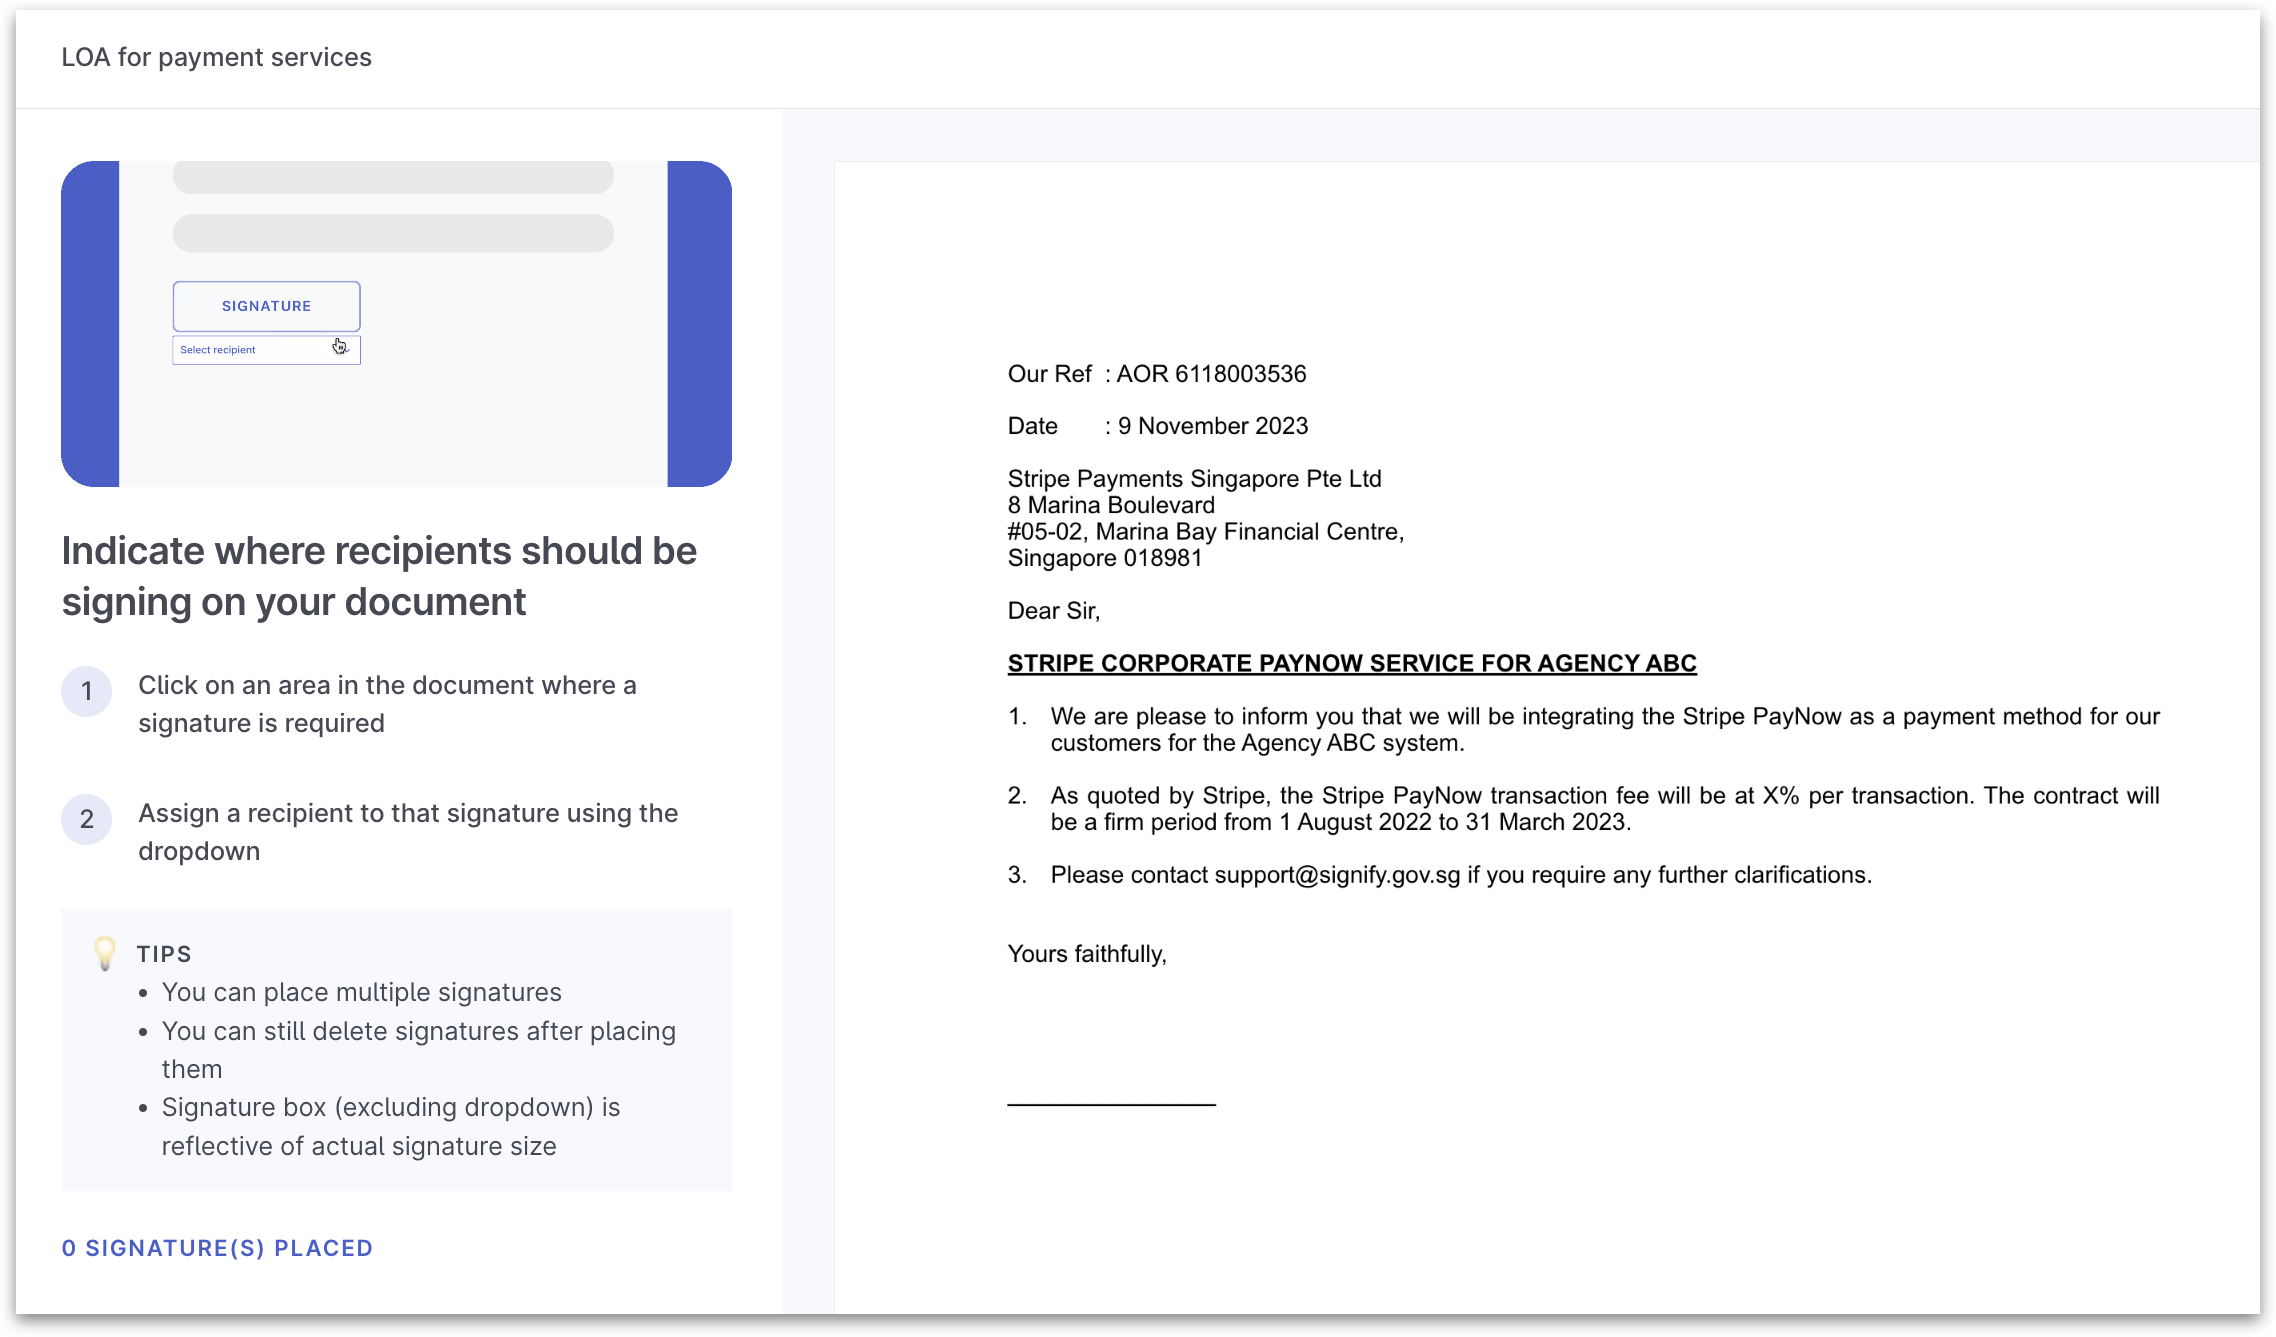
Click on where you would like the signatures to be and boxes will appear. Do note that signature boxes cannot overlap each other and you may also delete the boxes. Signature boxes are 72px by 208px. From 30 September 2026, the signature will increase to 7.78cm x 2.12cm (294 x 80 pixels).
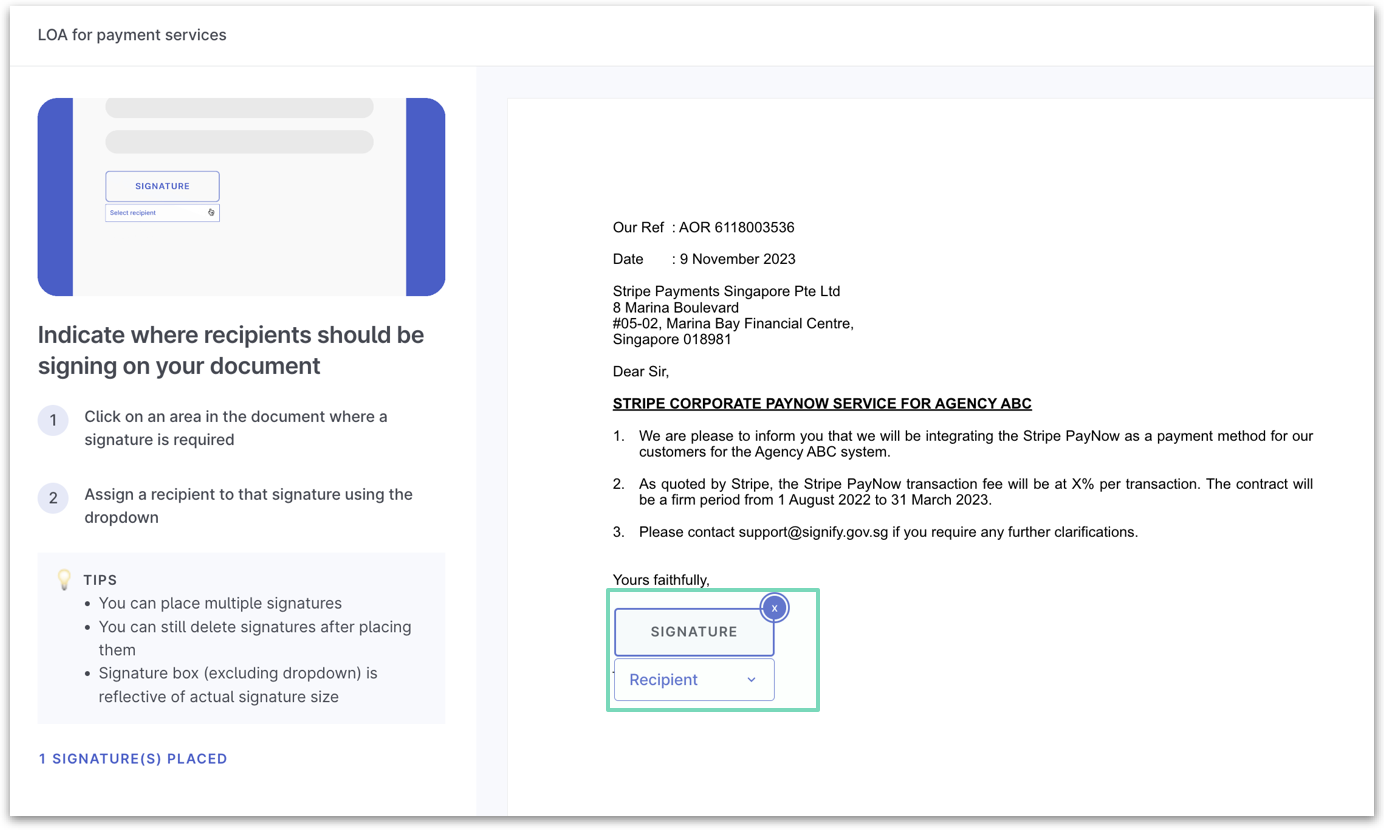
Minimally, each recipient you have indicated on the previous page needs to be assigned to a signature box, otherwise you will not be allowed to proceed.
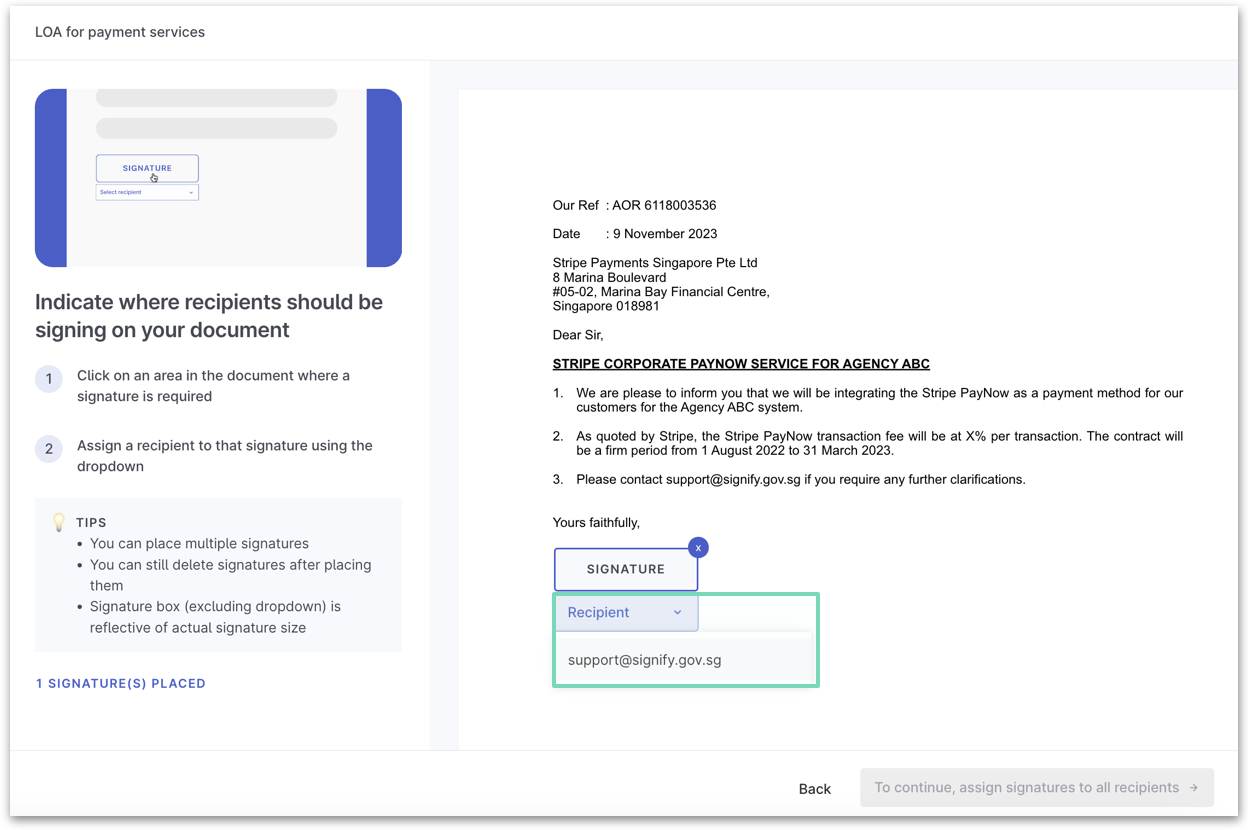
Important! Please note that typically 1 signature is sufficient as Signify signatures applies to the entire document. If you have a workflow today that requires capturing a signature on every single page, do consider making changes as it is no longer necessary.
Step 4b "Copy shareable link" mode: You can whitelist specific NRICs to restrict document access to authorized viewers. Placing signatures is just like Step 4a, with one exception: the signature placeholders are left unassigned.
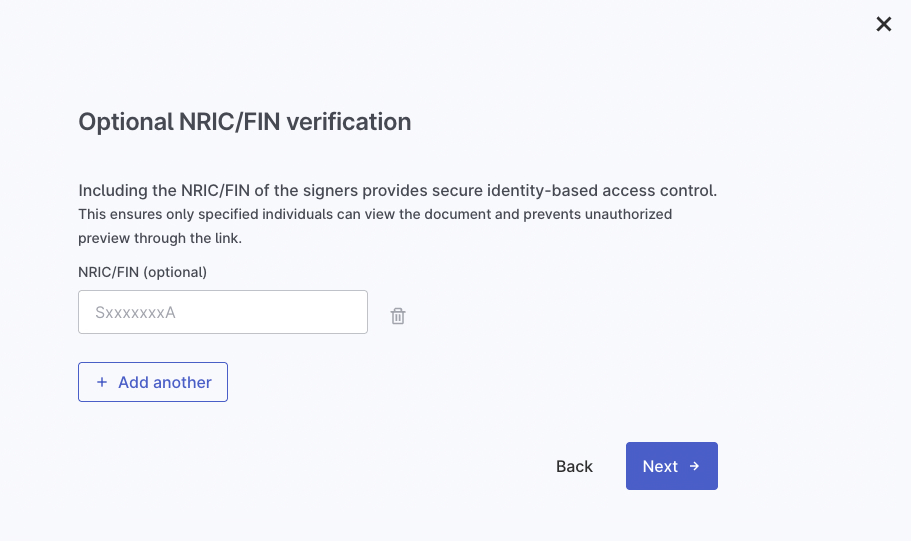
Step 5: Edit custom message sent to signers
Step 5a "Email to recipient" mode: You will be allow to send a message (instructions, notes) to each recipient.
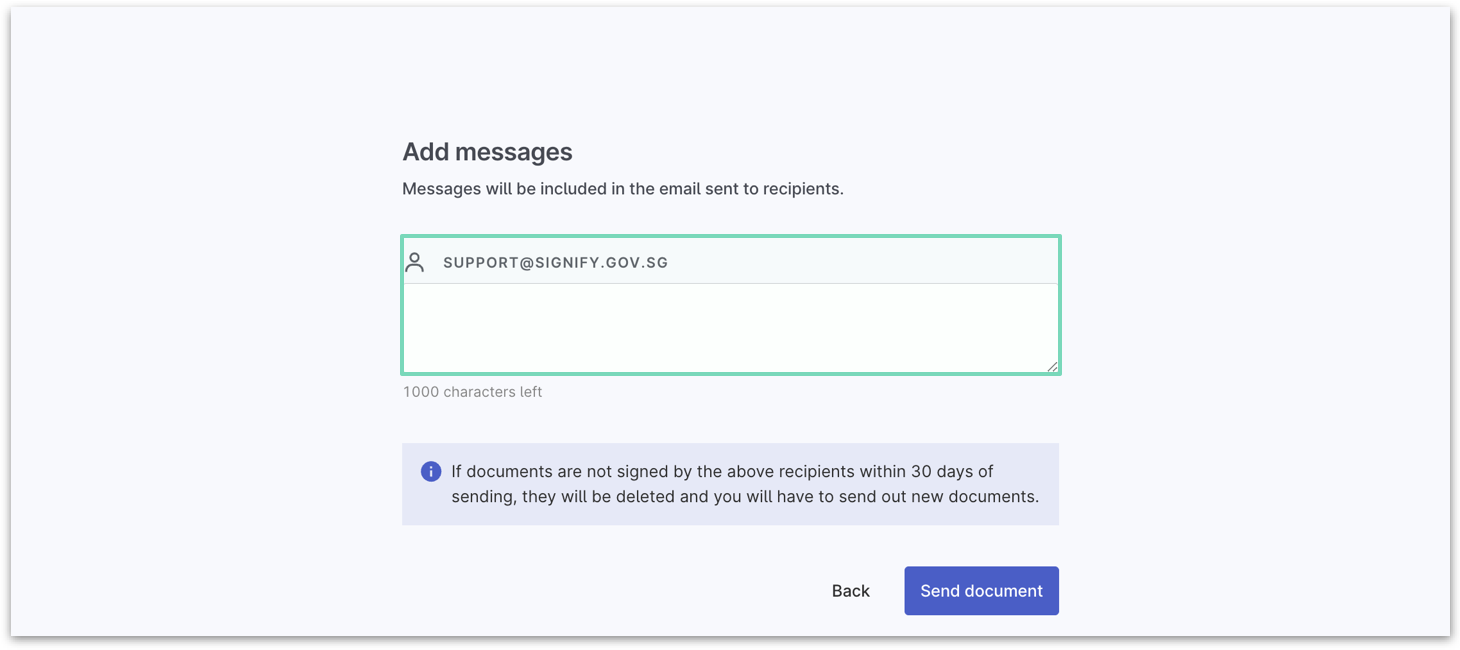
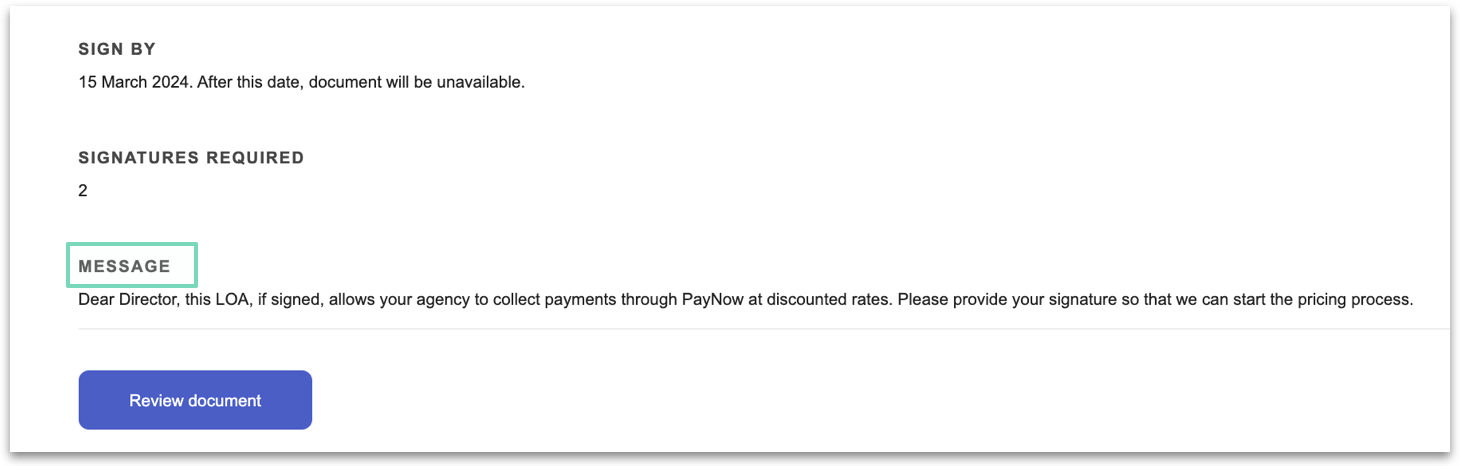
Step 5b "Copy shareable link" mode: You brought to the document preview page where you can copy the link (URL) to be shared.
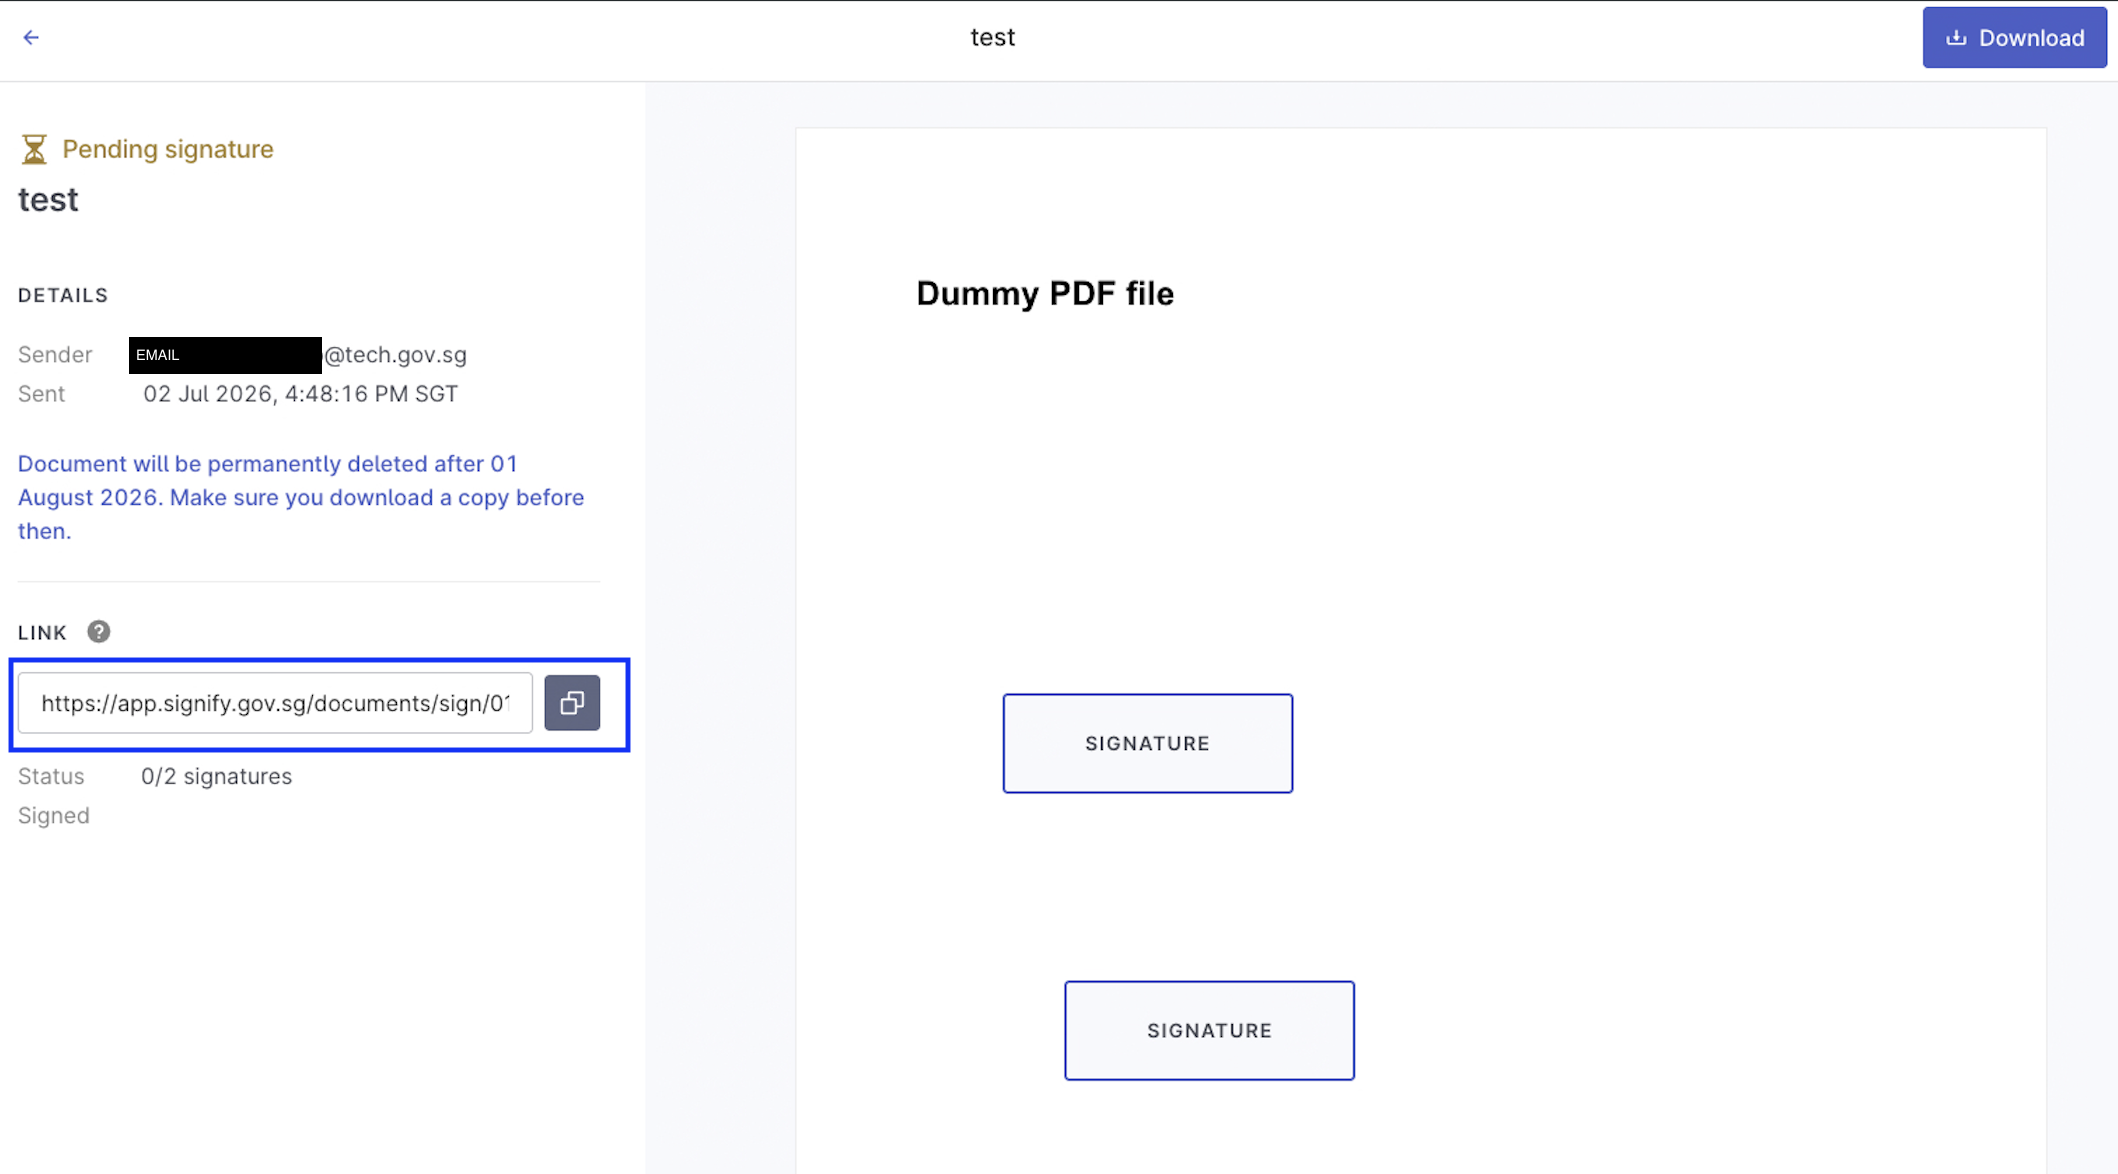
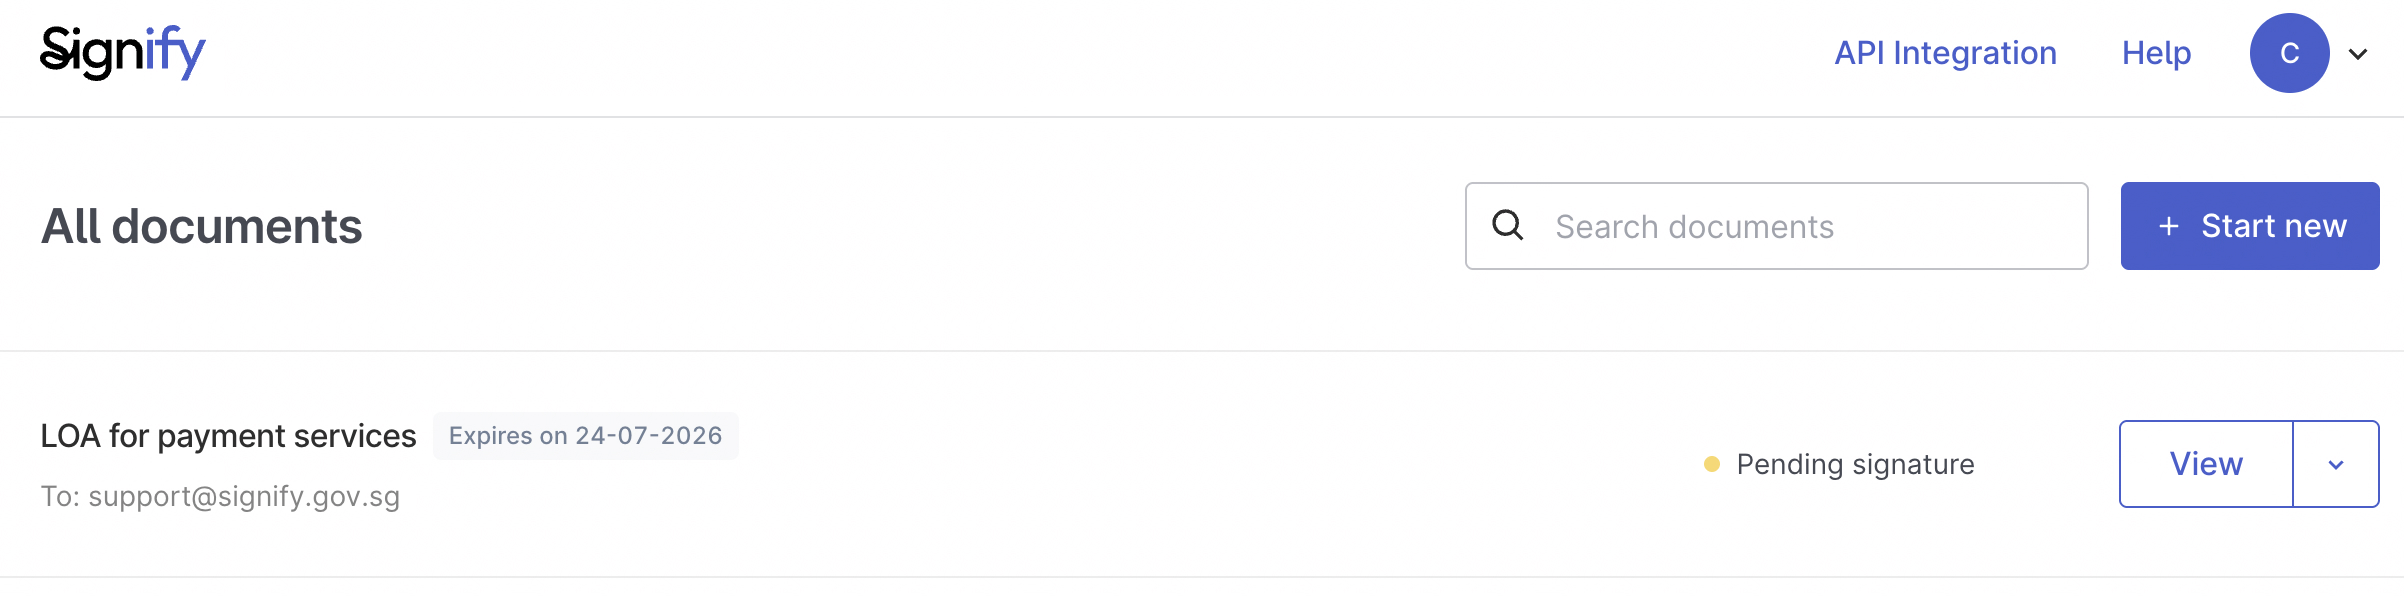
Step 6: Await signatures from signers
Workflows that say "need to sign" and in yellow means that a signature is still required. You may click "View" for more details.
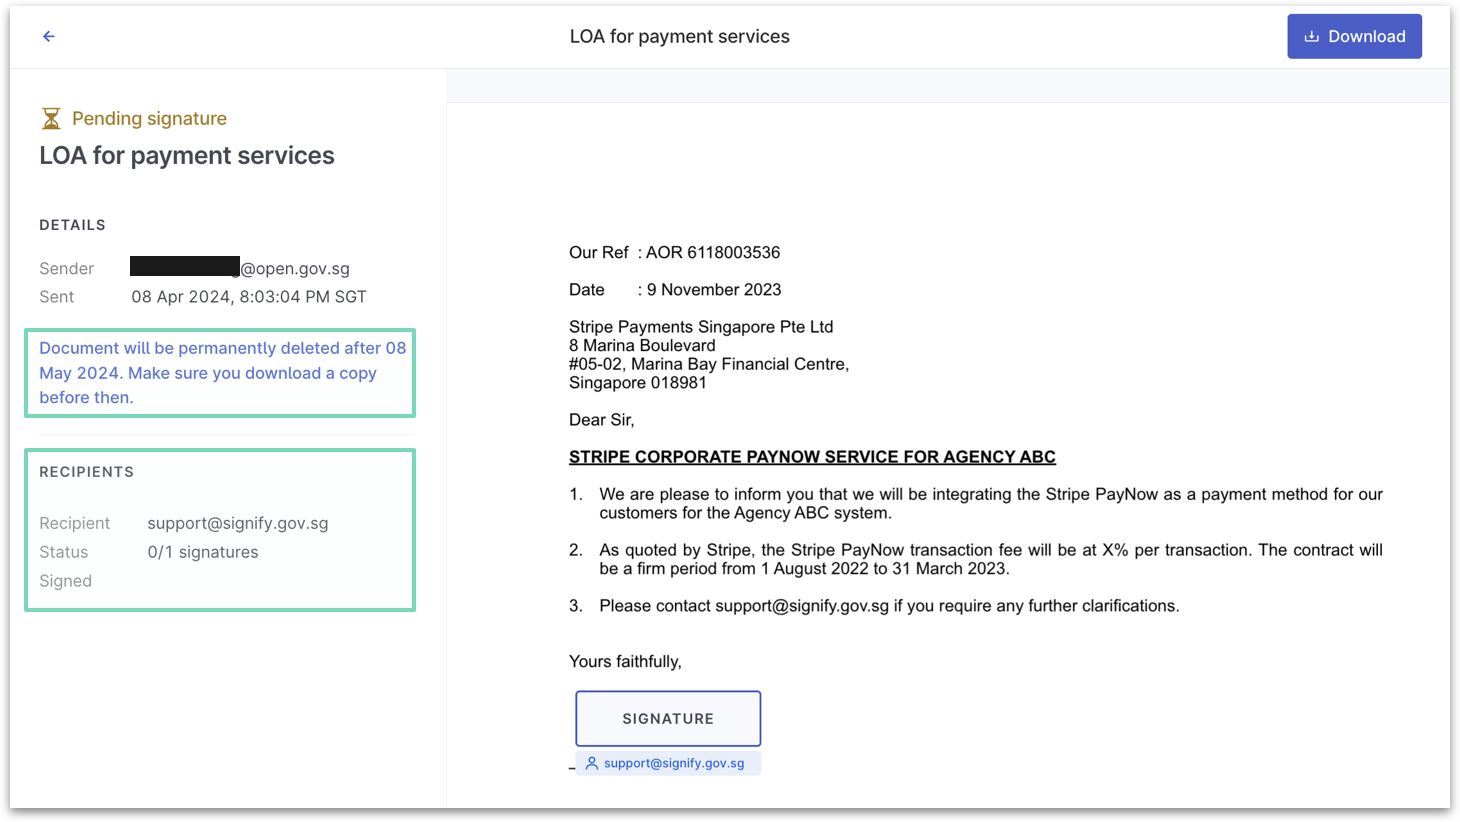
Here, you can see that the status, recipients and document. You would also notice that the document will be purged after 30 days.
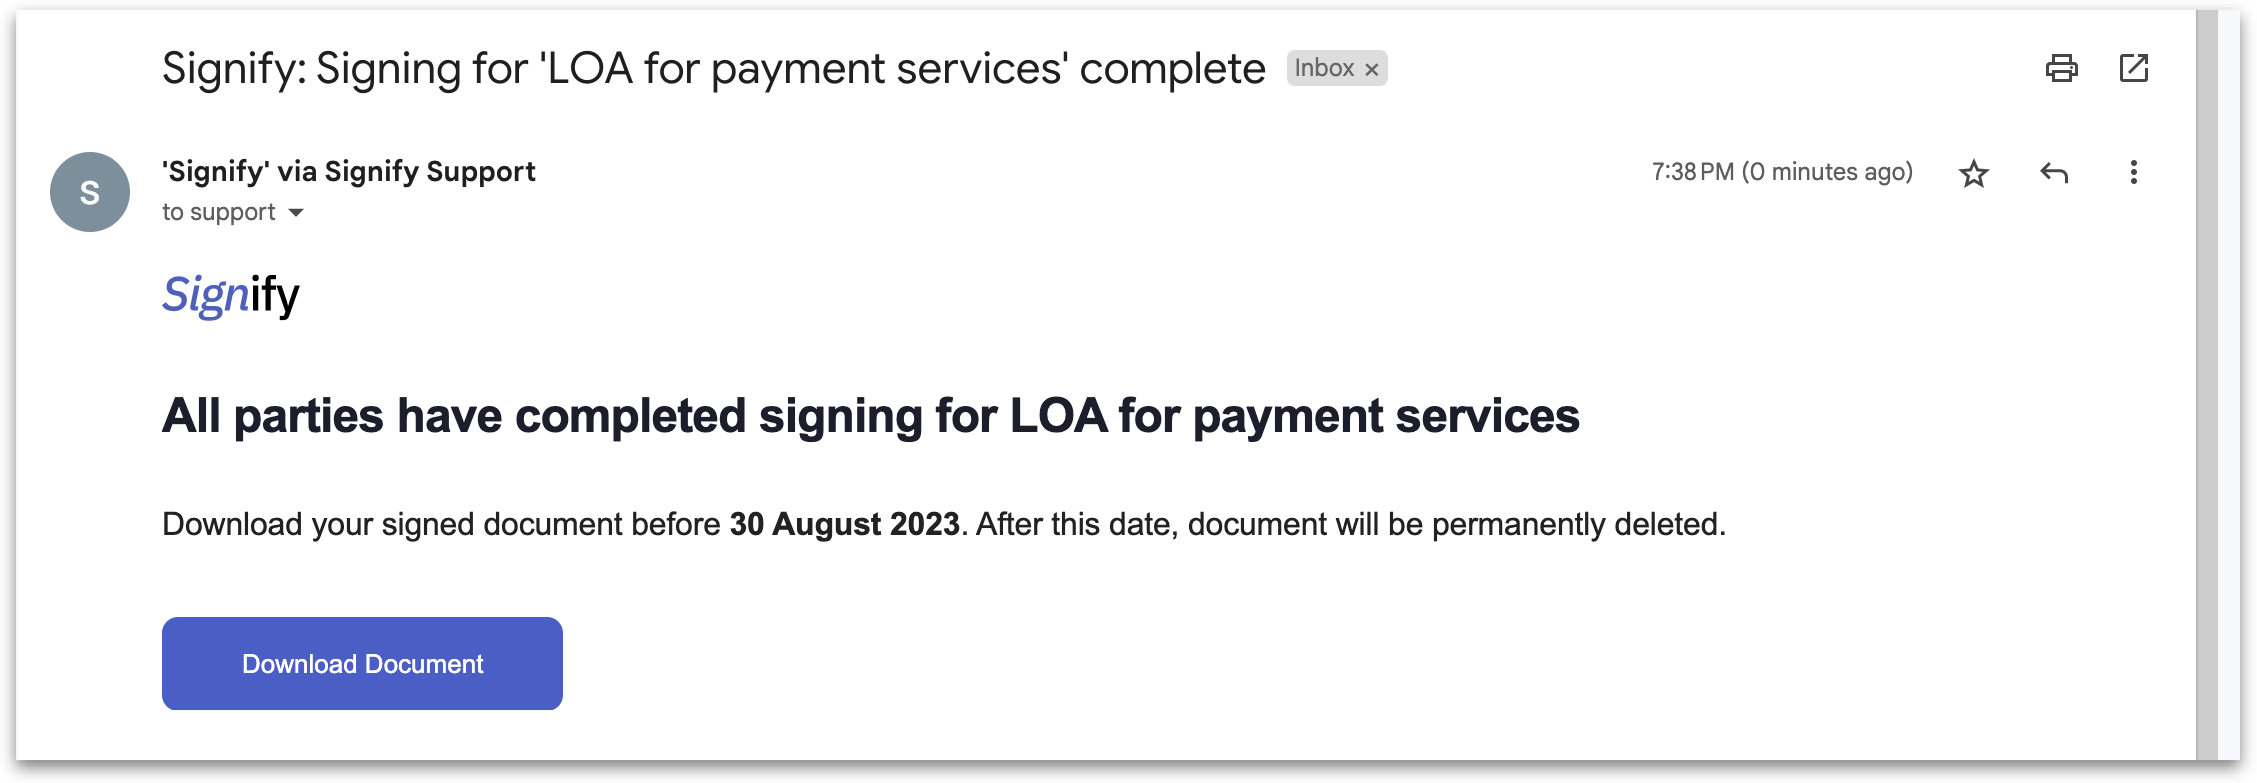
Step 7: Receive email once all parties have completed signing
The status will also change to "Completed".

[Advanced] Document filling
Document filling
Signify collaborates with docCentral (built by CPF) for FormSG <> Signify integration.
docCentral is available for all public officers / PHIs to use for free.
- Refer to the docCentral user guide,
- Fill this form to contact the docCentral team directly
With docCentral, admins can create custom Signify documents through 2 ways:
- FormSG collected data
- Uploaded CSV of data rows
Demo with docCentral
In this example, we are using FormSG to send out signable documents. This can be used internally or shared externally. Demo output: https://go.gov.sg/signify-doccentral-demo
The workflow starts with a respondent filling in the form.
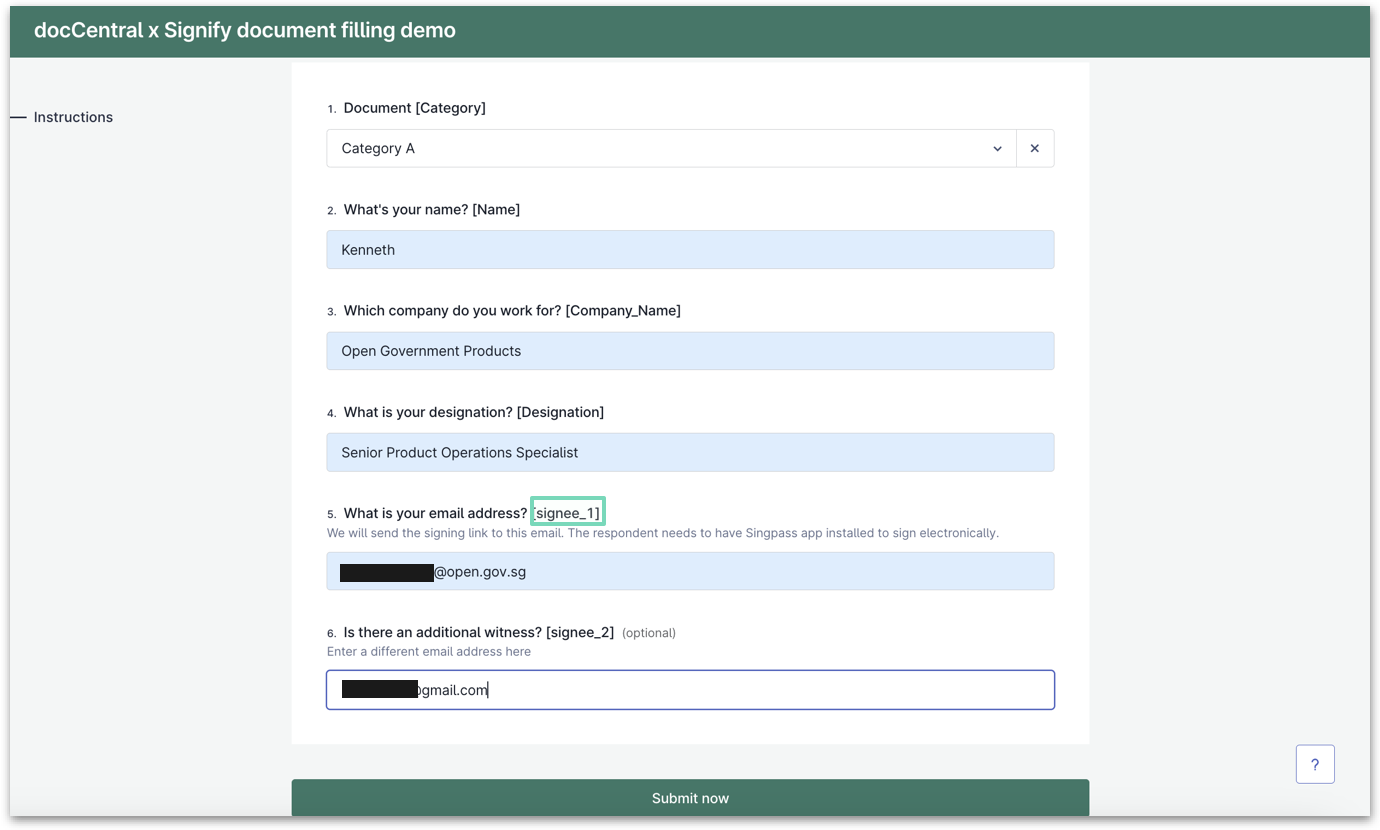
Notice that there is an email field labelled as "signee_1".
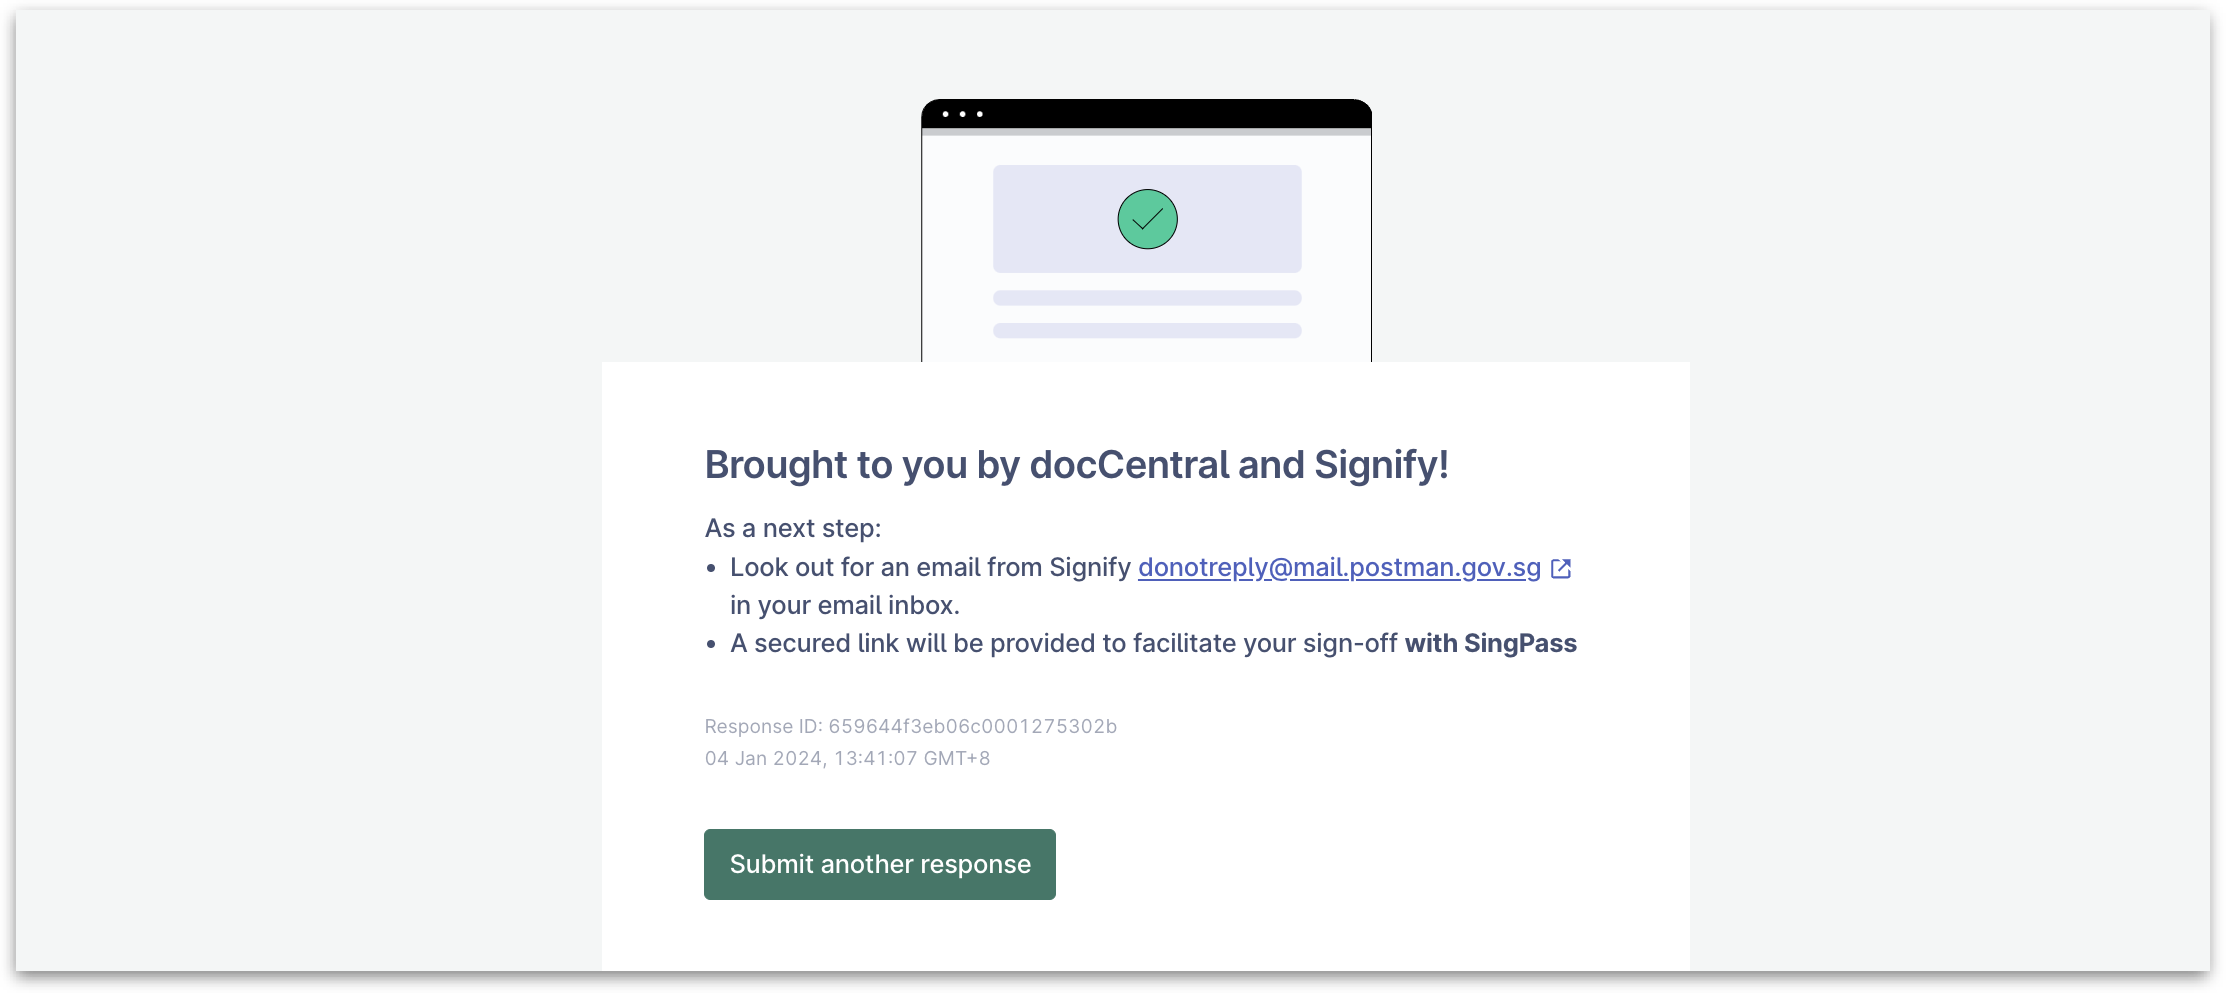
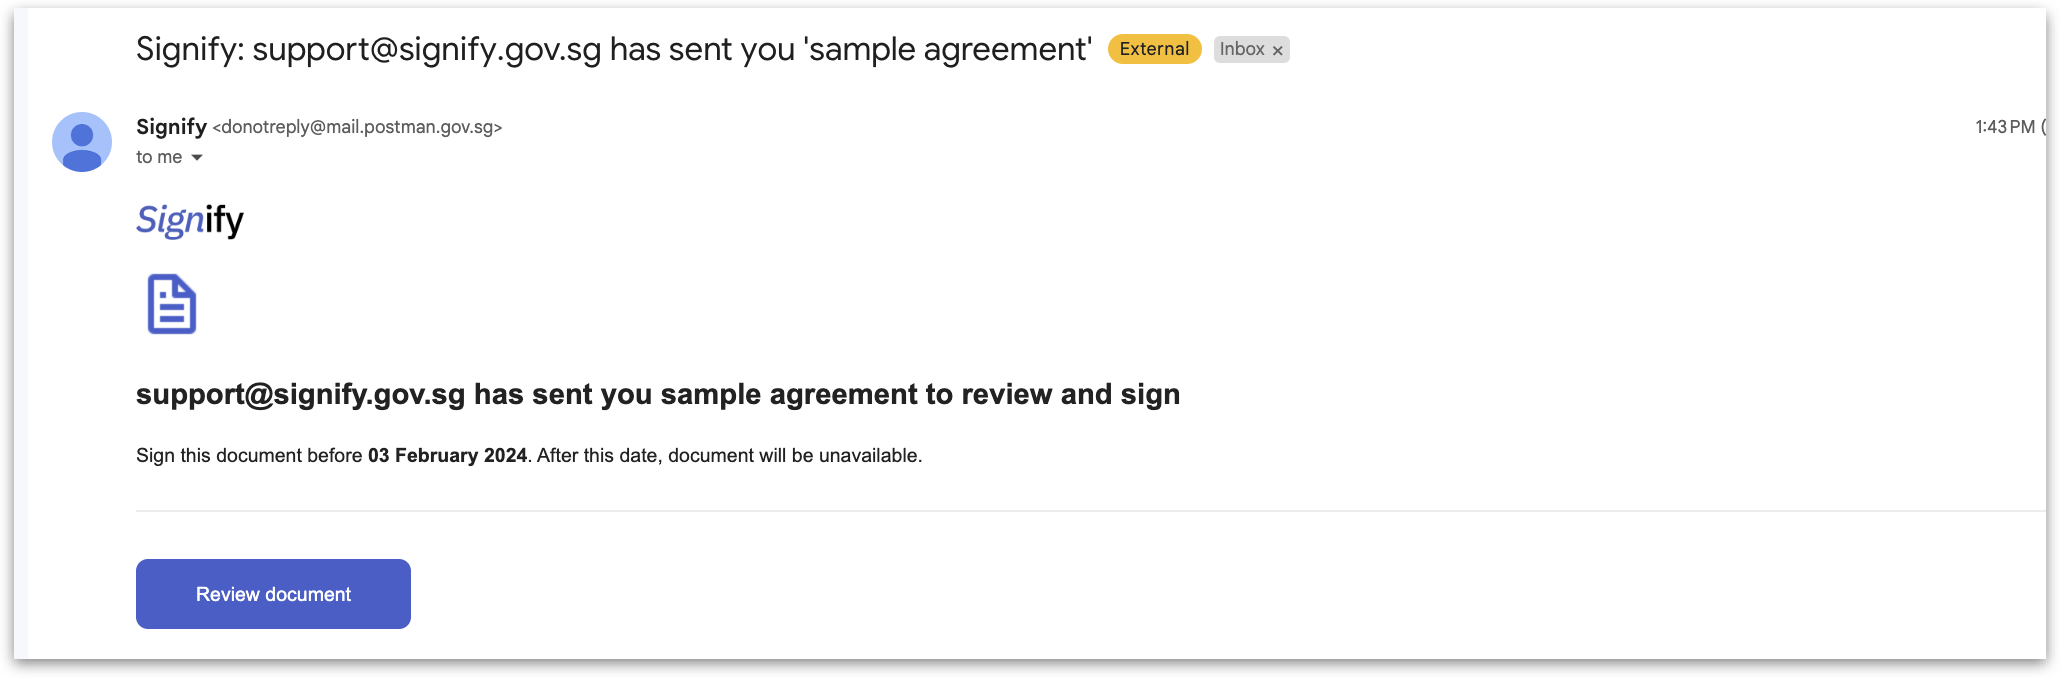
Upon submission, a signing invitation is sent via email to the email entered in email field. The signee will click on "Review document".
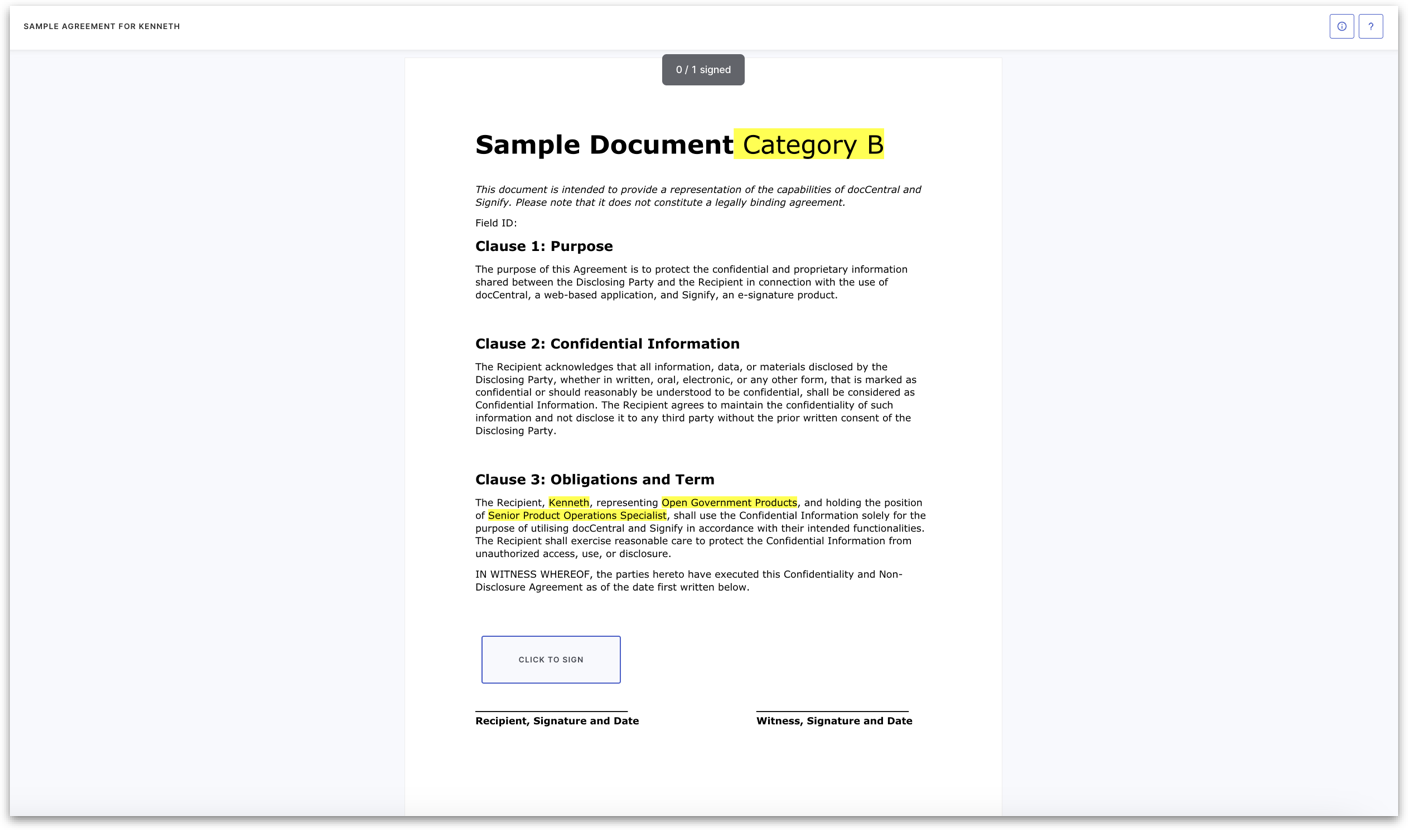
They will be brought to Signify page to login in then to proceed with signing with Singpass.
Was this article useful?